


Upgrading my chromebook
The process of installing GalliumOS on an ACER R11My previous development laptop was an Acer R11 chromebook. I always ran it in developer mode with all the Linux packages I needed installed via chromebrew. This setup worked great except for GUI programs, as (at the time), the built-in Wayland server on the chromebook was not exposed to the user in a meaningful way. I relied on an internal tool from Google called sommelier to translate X11 calls to the internal Wayland server. None of this was ideal, but with a lot of scripts and aliases, I made it work.
Recently, I decided to remove the locked-down ChromeOS all together, and set the laptop up with GalliumOS so it can be used as a lightweight code-review machine with access to some useful tools like VSCode and GitKraken. This whole process is actually fairly easy, and a good way to breathe new life in to an old chromebook. This guide will be R11-specific, but the process doesn't vary too wildly between models.
Developer mode
A standard feature on chromebooks is "developer mode". This is a hidden boot mode that is designed to give ChromiumOS contributors and Google developers access to debug tools when testing new OS builds. Along with debug tools, this mode also exposes a Linux terminal with root access to the user via Ctrl + Alt + ->. On an extremely locked down system like a chromebook, this terminal access exposes a lot of new capability. For this use case, we will only use it to modify the system bootloader.
To enable developer mode, simply press Esc + Refresh + Power, and let the chromebook reboot. Once the recovery screen pops up, press Ctrl + D, and the device is now in developer mode.
Write protection
This step will void your device's warranty. Chromebooks are able to handle anything you throw at them. Even if you were to delete important system files to the point the device can no longer boot, hopping in to recovery mode can reset the device to a working state. This works via ChromeOS's write protect mechanism. All important files are protected by hardware-enforced write protection. Since the process of loading a new operating system onto the device involves overwriting important system files (like the BIOS), we must physically disable write protection.
Luckily, on the Acer R11, this process is very simple. Firstly, unscrew the laptop's bottom plate to expose the motherboard (some screws are hidden under rubber feet). With the backplate off, you will find a screw that looks like this:
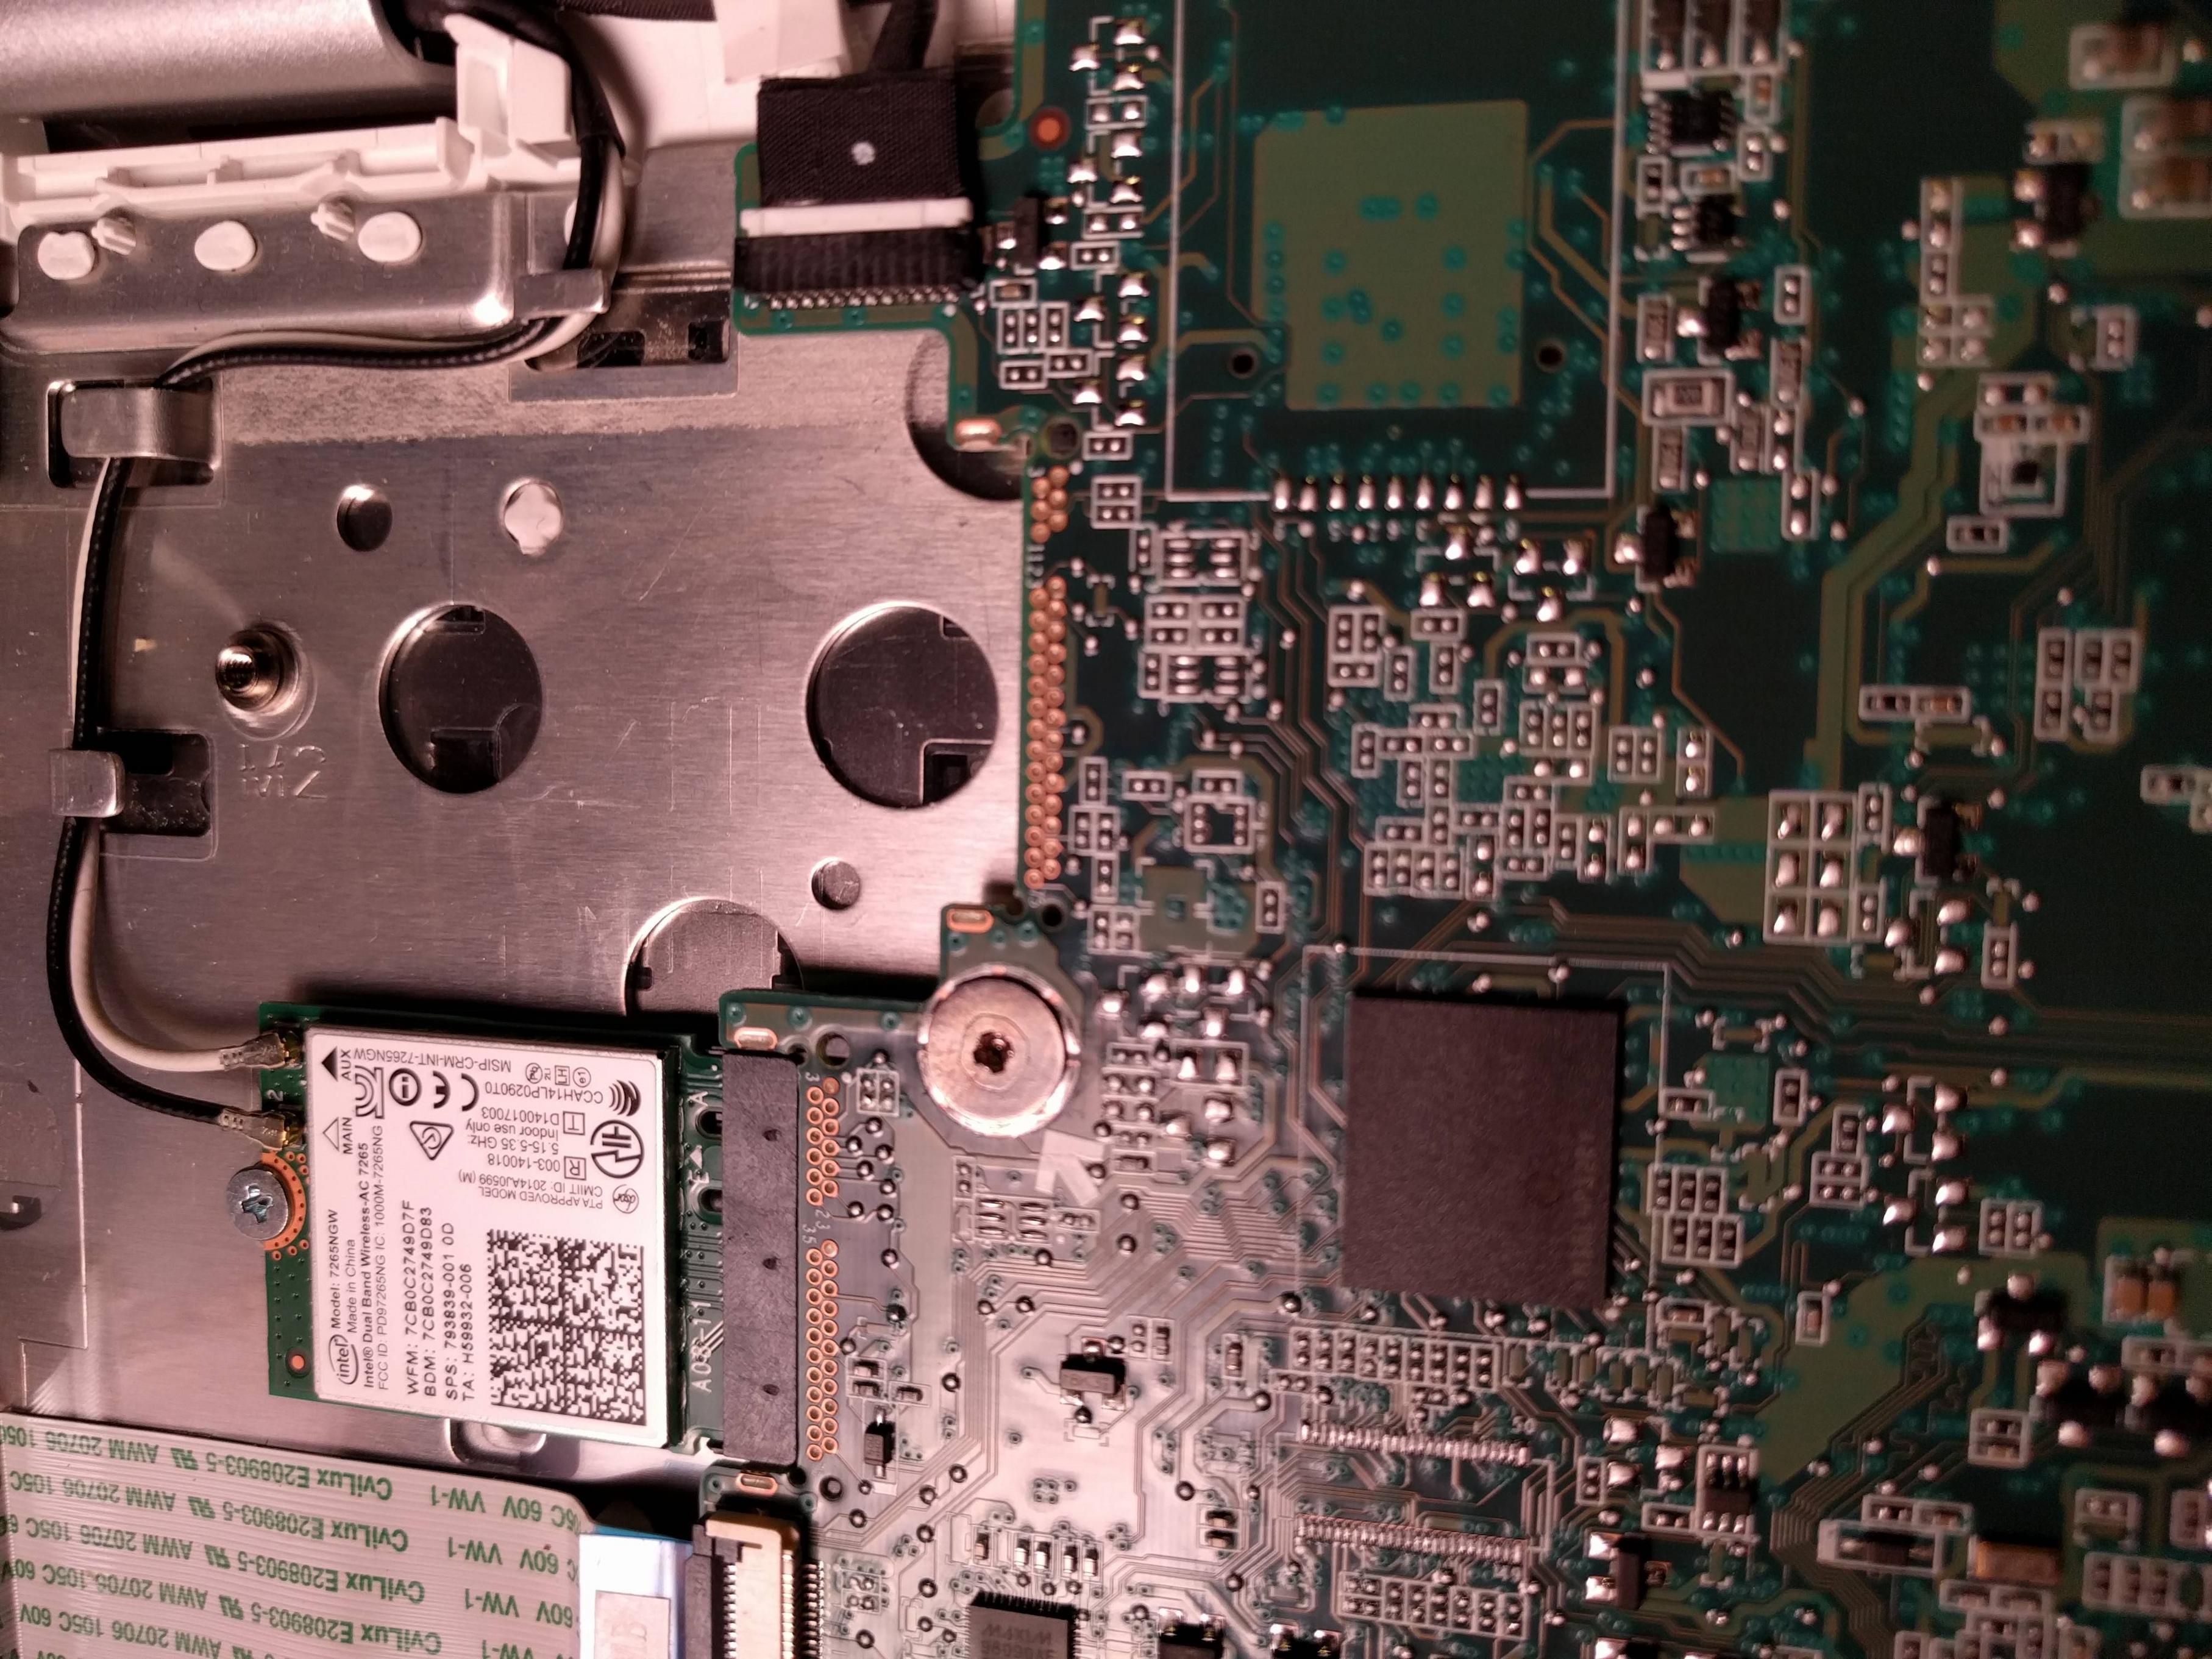
The screw is hard to miss, it is beside the WIFI card, an has an arrow pointing to it. Simply remove it, and put the laptop back together. You now have a fully unlocked device.
Flashing a custom bootloader
Mr Chromebox, a well known person in the world of Chromebook modification, provides and maintains a very easy to use shell script that handles bootloader modifications automatically. To use this tool, open up the ChromeOS terminal (Ctrl + Alt + ->), log in with the username chronos (you must already be logged in to your personal Google account. This will not work from the login screen), and run:
crossystem dev_boot_usb=1 dev_boot_legacy=1
cd; curl -LO mrchromebox.tech/firmware-util.sh
sudo install -Dt /usr/local/bin -m 755 firmware-util.sh
sudo firmware-util.sh
This will open up the firmware-util settings screen.
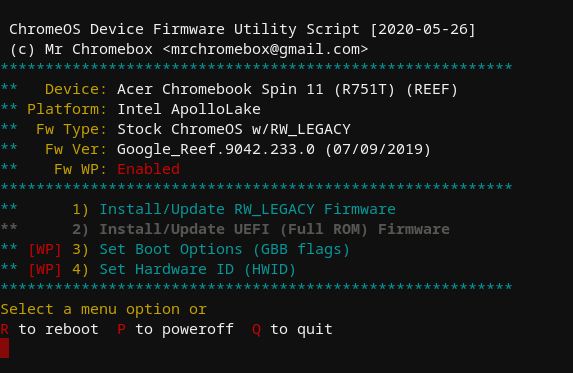
You will want to select the RW_LEGACY option to load the RW_LEGACY / SEABIOS payload. The UEFI option is technically the better choice, but it will completely remove the device's ability to run ChromeOS again in the future.
Setting fuses
The RW_LEGACY payload only works if the laptop always has power. Once the device completely runs out of power, the boot settings are wiped from the device (not something we want). The solution is to modify the system gbb fuses. This sounds complicated (and it is), but Mr Chromebox comes to the rescue again with the GBB Flags option in his script. After the RW_LEGACY payload has been configured, run his script again, and select GBB Flags.
Installing GalliumOS
On another computer, download GalliumOS (make sure to select the Braswell option), and create a bootable USB. Plug this USB into the Chromebook, reboot, and press Ctrl + L as the warning screen pops up. This will begin the GalliumOS setup process (which is identical to that of Ubuntu).
Enabling verbose boot
It is nice to know what is happening when the device is booting. To disable the boot animation and replace it with the boot log, edit /etc/default/grub, and replace both the quiet and splash arguments with noplymouth in the GRUB_CMDLINE_LINUX_DEFAULT options. Next, run the following, then reboot:
sudo update-grub